In its simplest form, Salesforce Path provides a visual indicator of progress along a set of stages, statuses or custom picklist values. Organizations use it to reinforce methodology, such as sales teams through their Leads or Opportunities. Support teams use Path to visualize support processes. Marketers are able to use it on Campaigns. Like many features in Salesforce, Path is available for use on Custom Objects. We’re even able to display it for Picklists on Accounts and Contacts!
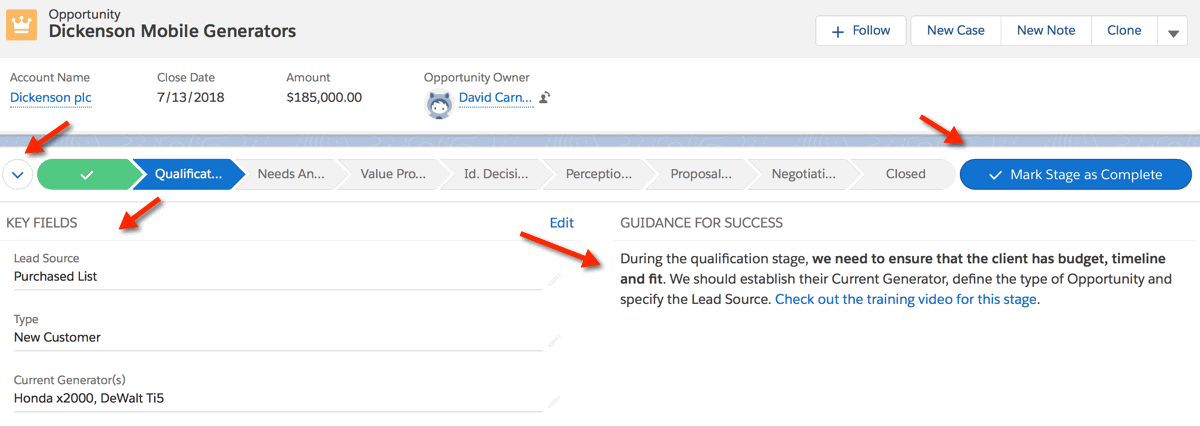
Salesforce Path Features
Beyond its availability on many Objects, Path can display Key Fields for each stage, along with corresponding “Guidance for Success”. Guidance can include rich text such as bold, italics, links and bullets, along with images. A user simply needs to click on the carat to the left of the Path. Click once to expand. Click again to close. This is perfect for ramping staff up on a new process, and ensuring staff enter important information when it is needed.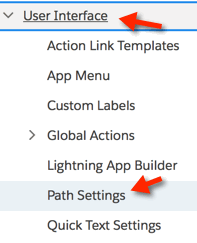
Setting up Path is Simple
The first step is deciding on which Object you want to add Path. Next you need to choose a Standard or Custom Picklist Field for Path to display. (If necessary, create a Custom Field of Data Type Picklist.) If this is your first Path, you may need to Enable Path, which only requires a simple click. Once enabled, you can click New Path to create your Path.
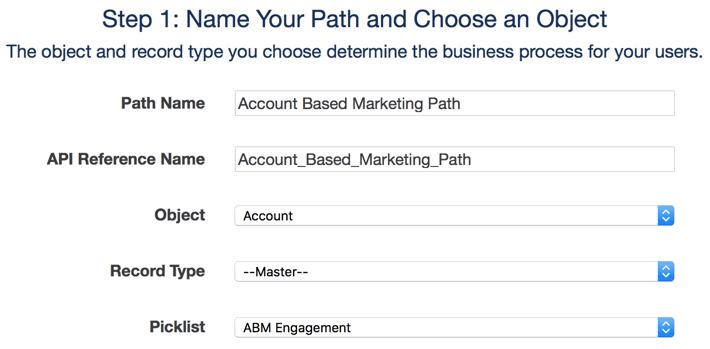
Step 1 (of three) requires you to select the Object and Field. A side option here is to specify a particular Record Type. If this Path is on Lead, Opportunity, or Case, if you specify a Record Type than the corresponding Business Process will determine which Picklist values are displayed. (note: Solution is yet available in Lightning) In the screenshot below I am creating a Path to support an Account Based Marketing (ABM) initiative. To support this I created a Custom Field called ABM Engagement to use in my Path.
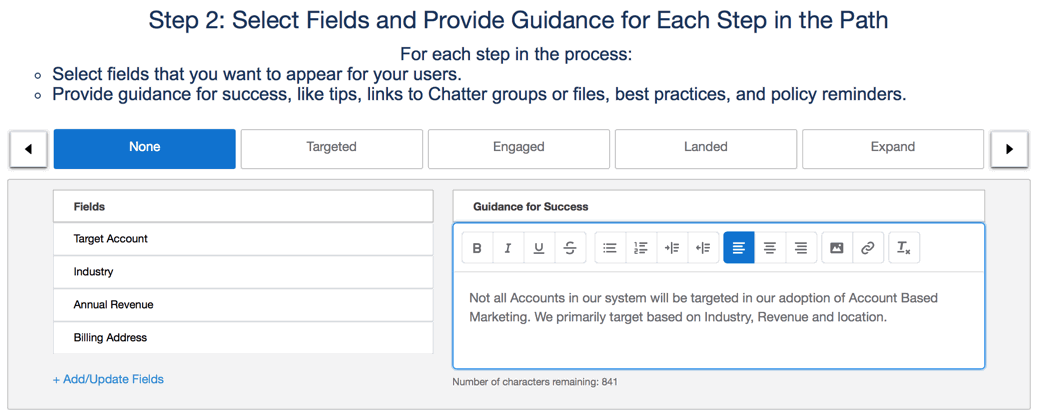
In Step 2 we’ll go through each Picklist value, adding Key Fields where appropriate and up to 1000 characters of relevant text for Guidance for Success. Note that you do not have to add anything, or you can mix and match with Key Fields in one, both in another, and so on. In this example, I added both Key Fields and some rich text Guidance. A Picklist value without Key Fields and Guidance cannot be expanded, or will collapse the section automatically. This feature is an excellent way to introduce a new methodology or simply reinforce process!
The third and final step in creating your Path is to make it Active by clicking on the radio button and then Finish. (As a rule in Salesforce, it seems, innocuous features are Inactive by default, and potentially harmful ones are Active.)

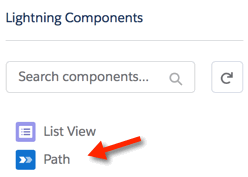 Put the Path on a Lightning Page Layout
The last thing we need to do is put the Path Component onto the Lightning Page Layout, using the Lightning App Builder. In this case, I will drag and drop Path onto the Account Layout, directly below the Highlights Component. When I do this I can immediately see my newly created Path.

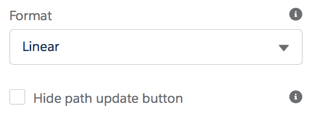 Set the Path Properties for the Component
With the Component still highlighted in Lightning App Builder, I can edit the Path’s Properties over in the right side panel. I use the default Format of Linear (versus a Non-Linear Path) and elect to “Hide path update button.” This removes the “Mark as Complete” button to the right of my Picklist values, essentially making it a read-only display.
For my Account Based Marketing Example, the final result is the following:

 One last note about Salesforce Path is that from the main Path page in Setup, you can check a box to have the system “remember” User preferences. If a User expanded the Path on Account and navigated away, Salesforce will remember this preference.


This is a great, concise summary of paths that made it very simple to understand. Do you know if you can report or filter on which step of the path is the current one? In this example you have – show accounts that = engaged for ABM Engagement.
Hi Wendi, yes, we can report on it and filter on it because the current path step is driven by a regular picklist field. Best of luck!
David
thanks, this is was so useful
Glad to hear it Victor! Best of luck with your system.
– David